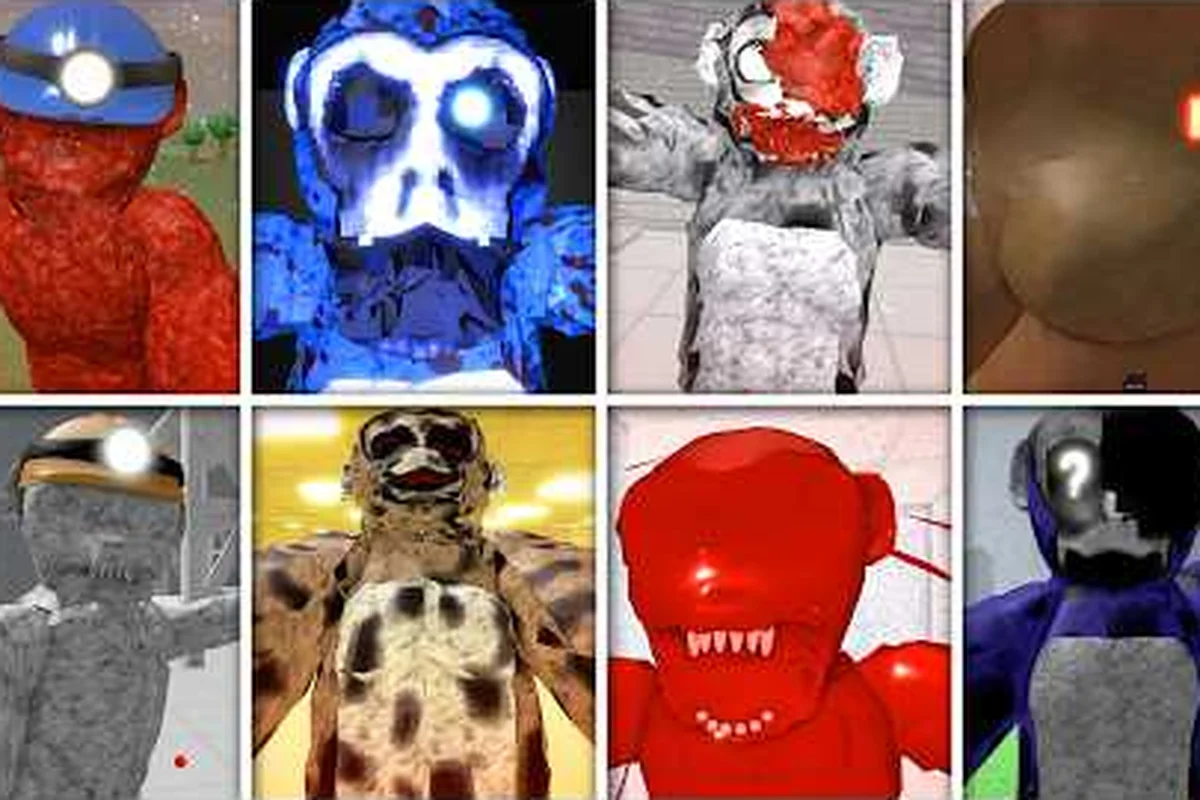
Ranking Lethal Ape threat levels is the fastest way to know which chases will wreck your run and which ones you can almost coast through. Every monster in the roster punishes a different habit — some punish sprinting, some punish stalling, and a few punish the very act of breathing too loudly. This breakdown sorts the full sandbox roster from the scariest chases to the ones beginners can learn on, then layers in how the Lab, Caves, and Forest gamemodes shift those numbers. The Roblox Lethal Ape monster roster lists the core six plus the Lab's infected former owner, and that's the baseline roster this tier list grades against.
By the end you will know which encounters deserve a panic plan, which ones reward calm footwork, and where the Lethal Ape gamemode tier list flips the most. If you are brand new to the sandbox, it also answers the recurring question — lethal ape is it scary — with concrete evidence instead of vibes.
How Lethal Ape Threat Levels Are Measured
Before any ranking makes sense, the grading rubric has to be visible. Threat level here is not just "how fast does it run" — it is a blend of detection range, chase tempo, audio cues, map coverage, and what the monster does after it catches you. A monster with mediocre speed but huge detection is more threatening than a faster monster that triggers only in tight corridors.
The Four Grading Axes
Every entry below is scored on the same four axes so the ranking stays consistent across maps, which means a monster with poor Detection Range but instant Catch Consequence can be directly compared to one with long Detection Range but only a jumpscare on hit. Sticking to a shared rubric prevents map-specific bias — for example, a tight indoor corridor makes any monster's Chase Speed feel twice as fast, so a separate "per-map" column would dilute the cross-map threat ranking you actually need to read at a glance.
| Axis | What it Measures | Why it Matters |
|---|---|---|
| Detection Range | How far the monster can hear or see you from | A long range turns any small mistake into a chase |
| Chase Speed | Sprint pace once triggered | Decides whether the gap closes in 2 seconds or 12 |
| Catch Consequence | What happens on hit / jumpscare | Some monsters only jumpscare, others reset your run |
| Escape Margin | How much room the map gives to break line of sight | Determines if the threat is recoverable or instant run-ender |
Threat Tier Bands
The four axes — detection range, chase speed, catch damage, and escape margin — collapse into five threat bands ranging from S (Apex Threat) down to D (Minimal Threat), used as the unifying scoring shorthand throughout the rest of the article. Each band clusters apes that feel mechanically similar in a chase, so a Sandman-tier monster and another ape with comparable detection radius end up in the same row even if their cosmetics differ wildly. This lets the threat tier bands double as a lethal ape escape difficulty ranking, since band S and A apes leave almost no room for recovery while band C and D encounters function more like practice runs for newer players learning lethal ape chase difficulty fundamentals.
| Band | Label | Typical Profile |
|---|---|---|
| S | Apex Threat | Massive detection, fast sprint, harsh catch, low escape margin |
| A | High Threat | Fast chases, decent detection, recovery is possible but punishing |
| B | Mid Threat | Average stats, balanced counterplay, good learning encounters |
| C | Low Threat | Slow or narrow triggers, generous escape routes, mild jumpscare |
| D | Minimal Threat | Cosmetic encounters, audio-only scares, no run-ending mechanics |
The community-maintained Sandman - Roblox Lethal ape Wiki entry lists Sandman's speed at 41.5, which is the speed reference used to anchor the chase-speed axis across the roster. Because Sandman sits at the top of the S-band alongside its high detection radius and punishing catch damage, every other ape's chase-speed value is implicitly benchmarked as a ratio against it — so an ape clocking ~25 sits roughly in B-band mid-threat range, while sub-15 chasers fall into the C/D bands where lethal ape escape difficulty ranking tips toward "practice encounter" rather than run-ender.
Core Roster Threat Ranking
The Lethal Ape core roster is six monsters plus the Lab's infected former owner. Threat levels move as the roster grows, so this list mirrors the sandbox as of the current community wiki snapshot. If you want a separate ranking that splits the roster differently, the Lethal Ape tier list covers that angle.
Top Tier — Apex Chases
| Monster | Detection | Chase Speed | Catch | Escape Margin | Band |
|---|---|---|---|---|---|
| Sandman | Wide | 41.5 (community wiki) | Hard catch, run reset | Low | S |
| Ashy | Wide | Fast | Hard catch, run reset | Low | S |
| Lab Infected | Extreme | Fast | Run-ending on contact | Very low | S |
Sandman is the mascot and the benchmark — listed by community data as a sand-based monster and Ashy's brother. Ashy is his sibling and shares much of the threat profile, just with a different audio cue. The Lab's infected former owner is in a class of its own because the Lab map gives almost nowhere to hide and the monster is described in community lore as exceptionally violent after a corrupt worker's experiment.
High Threat — Punishing but Recoverable
| Monster | Detection | Chase Speed | Catch | Escape Margin | Band |
|---|---|---|---|---|---|
| Dus | Medium-wide | Above average | Hard jumpscare | Medium | A |
| Lost | Medium | Above average | Hard jumpscare | Medium | A |
| Scar | Medium | Fast | Hard jumpscare | Medium-low | A |
Dus and Lost are the upper-mid chases that still hit hard if you sprint at the wrong moment. Scar is the wildcard — slightly faster but with chase patterns that reward breaking line of sight. If you want a deeper write-up of which of these three tops the chart, the Lethal Ape hardest monster page ranks them against the full roster.
Mid and Lower Tiers
| Monster | Detection | Chase Speed | Catch | Escape Margin | Band |
|---|---|---|---|---|---|
| Kus | Medium-narrow | Average | Standard jumpscare | High | B |
| Gus | Footstep-only | Slow | Audio jumpscare | High | C |
Gus is the textbook escape-friendly monster. The Gus entry describes him as blind, listening for footsteps, and using the SOMA Coral Puppet chase sound — meaning that if you slow your walk to a careful creep, Gus effectively never engages. That single mechanic makes Gus the most-suggested monster for new players testing out a chase for the first time, and it is the most common piece of Lethal Ape monster suggestions shared in community threads.
Kus slots above Gus only because the detection radius is a touch wider, and that single radius advantage is what pulls him into Band B on the threat-level table while Gus stays stranded in Band C. Where Gus relies entirely on the footstep audio cue, Kus adds a proximity layer on top, so a careless creep can still trigger an engagement and force a standard jumpscare catch — but the escape margin still stays comfortably High because his chase speed remains locked to Average. In practice this makes Kus the natural second step in a new player's monster ladder, graduating learners off the SOMA Coral Puppet audio-only chase and onto proximity-aware routing before they face the genuinely punishing upper-tier Band A monsters.
Gamemode Tier List — How Each Map Reshapes the Chase
Threat levels do not exist in a vacuum. The Lab, Caves, and Forest gamemodes each hand the monsters different terrain, and that terrain changes the chase difficulty ranking for the same monster by a full band or more. This is the layer the Lethal Ape gamemode tier list usually misses — it ranks monsters, not monster-plus-map.
Lab vs. Caves vs. Forest Threat Shift
| Gamemode | Lighting | Escape Routes | Audio Masking | Net Threat Modifier |
|---|---|---|---|---|
| Lab | Bright | Few, narrow | Low | +1 band for every monster |
| Caves | Near-total dark | One main bridge, one storage area | Medium | +1 for fast chases, neutral for slow |
| Forest | Mixed | Wide, multi-path | High (wind, foliage) | -1 band for most monsters |
Lab — Highest Aggregate Threat
The Lab is where the Lethal Ape escape difficulty ranking spikes hardest. Long sightlines, few corners, and the resident infected former owner mean a single detection often turns into a 30-second chase with one or two exits. The Lab is the reason Sandman and Ashy are S-tier — their 41.5-class speed is lethal in long corridors where there is no corner to break line of sight at.
If you want a map-side walkthrough, the Lethal Ape Roblox map guide covers every gamemode's layout in detail, including which Lab rooms are the safest "hide-and-listen" spots — a key consideration for Hunters running solo runs, since Lab escape difficulty ranking drops noticeably when you pre-clear the two side offices before Ashy or Sandman starts patrolling the main corridor.
Caves — Navigation Is the Threat
Caves is the second gamemode listed on the Caves - Roblox Lethal ape Wiki page: a huge, extremely dark cave where the main challenge is finding the wooden platform bridge in the center that leads to the outside zone and its abandoned storage area — the community's standard exit route. Monsters are dangerous here, but navigation is the real threat, which means the chase difficulty actually drops if you memorize the bridge path.
| Monster | Lab Threat | Caves Threat | Why it Shifts |
|---|---|---|---|
| Sandman | S | A | Less chase distance, more corners |
| Ashy | S | A | Audio harder to localize in caves |
| Lab Infected | S | S (Lab only) | Lab-only encounter |
| Dus | A | B | Detection narrows in dark |
| Gus | C | C | Already footstep-only, dark changes nothing |
| Kus | B | B | Consistent across maps |
Forest — Most Forgiving
Forest gamemode's wide multi-path layout plus ambient noise (wind, branches) effectively de-threatens most chases. Detection is technically the same, but the masking and the multiple escape paths turn many S-band chases into recoverable A-band ones. It is the gamemode to grind in if you are still learning monster tells.
Threat-by-Audience Recommendations
The Lethal Ape monster suggestions that work for a first-day player are not the same ones that work for a chase-optimized veteran. This section splits recommendations by playstyle so you can pick the threat band that matches your current goal.
For First-Time Players
| Priority | Monster to Learn | Why | Avoid Until Later |
|---|---|---|---|
| 1 | Gus | Footstep-only trigger, easy to avoid | Sandman, Ashy |
| 2 | Kus | Slightly wider detection, good practice | Lab Infected |
| 3 | Dus | Teaches sprint discipline | — |
| 4 | Lost | Teaches audio cue reading | — |
For Players Who Want a Scare
If your real question is lethal ape is it scary — the honest answer is yes, but the scares are heavily concentrated in the S-band. A full compilation of every monster's jumpscare can be found in this EVERY Monkey JUMPSCARES in Lethal Ape video by Zaku, which is useful preview material before committing to a Lab or Caves run.
| Monster | Scare Type | Intensity | Trigger |
|---|---|---|---|
| Sandman | Visual + audio | Very high | Chase catch |
| Ashy | Visual + audio | Very high | Chase catch |
| Lab Infected | Full screen + audio | Extreme | Contact |
| Dus | Audio scare | High | Chase catch |
| Scar | Visual + audio | High | Chase catch |
| Kus | Audio scare | Medium | Chase catch |
| Gus | Audio only | Low | Chase catch |
For Chase-Optimized Veterans
| Strategy | Best Monster to Practice On | Skill It Trains |
|---|---|---|
| Line-of-sight breaking | Sandman | Cornering in narrow halls |
| Audio masking | Ashy | Sound layering in multi-monster rooms |
| Sprint timing | Dus | Knowing when to commit to a sprint |
| Slow-walk discipline | Gus | Movement economy |
Threat Levels and Monster Behavior — What the Numbers Don't Show
Speed and detection are the easy stats to quote, but Lethal Ape threat levels also depend on behavior quirks that never show up in a stat block. A monster's reaction to line of sight, its audio layering with other monsters, and its post-chase patrol pattern can swing a chase by a full tier.
Layered Threats — When Two Monsters Collide
The most lethal moment in any run is rarely a single monster in a single corridor. It is the moment a second monster triggers while the first is still chasing, which is when the Lethal Ape gamemode tier list breaks down the most. Layered chases:
-
Sandman + Dus — Sandman forces a sprint, Dus picks you up at the sprint's end.
-
Ashy + Gus — Ashy's audio cue masks Gus's footstep trigger.
-
Lab Infected + any — Lab Infected's wide detection stacks with any second monster.
Audio-Only Threats
Gus is the only monster where the threat is almost entirely audio — the SOMA Coral Puppet chase sound is the warning. Players who can localize this sound have effectively neutralized Gus, which is why Gus sits in C-tier despite being a listed core roster monster. If you are building a recommendation list for new players, Gus is always first.
Post-Chase Recovery
Catch consequence is the axis most tier lists skip. Some monsters only jumpscare and let you continue, while others reset progress, lock a door, or pull you back to spawn. The S-tier monsters all carry run-reset consequences, which is the real reason they stay at the top regardless of map.
| Monster | Post-Catch Effect | Run Impact |
|---|---|---|
| Sandman | Run reset | Total |
| Ashy | Run reset | Total |
| Lab Infected | Run reset | Total |
| Dus | Hard jumpscare, no reset | High |
| Scar | Hard jumpscare, no reset | High |
| Kus | Standard jumpscare | Medium |
| Gus | Audio jumpscare | Low |
If you want to track the roster as it grows with new monster updates, the Lethal Ape new monster update page tracks the most recent additions and how they slot into this same band structure.
Practical Takeaways — Building Your Own Threat List
The community wiki data is the floor, not the ceiling. Once you understand the four axes and the gamemode modifiers, you can build a personal Lethal Ape gamemode tier list by weighting each axis differently — for example, a chase-heavy player might double the Chase Difficulty weight but discount Escape Difficulty Ranking by 30%, producing a custom threat ranking that better matches their own reflexes and route memorization.
Three Rules for Personal Threat Calls
-
Detection range is more lethal than chase speed. A monster that triggers at 30 studs is twice as dangerous as a monster that triggers at 15 studs, even if they share the same 41.5-class sprint.
-
Map beats monster. The same monster is a full band harder in Lab than in Forest, so always weight threat by the gamemode you are actually playing.
-
Catch consequence decides the run. A monster that only jumpscares is recoverable. A monster that resets the run is the one you plan around, even if its raw stats look lower.
Common Threat List Mistakes
| Mistake | Why It Hurts | Fix |
|---|---|---|
| Ranking by speed alone | Ignores detection and catch | Use the four-axis table |
| Treating all maps equally | Misses the +1/-1 band shift | Apply the gamemode modifier |
| Skipping post-catch effects | Overrates audio-only monsters | Add catch consequence to the score |
| Ignoring audio cues | Gets caught by Gus on hard mode | Slow walk near Gus's patrol radius |
Lethal Ape Monster Suggestions — Quick Reference
| Your Goal | Monster to Prioritize | Reason |
|---|---|---|
| Learn to escape chases | Gus → Kus → Dus | Easiest to hardest |
| Survive Lab | Practice Sandman | Lab's main threat |
| Survive Caves | Memorize bridge path | Navigation > monsters |
| Maximum scare | Sandman, Ashy, Lab Infected | S-tier jumpscares |
| Chase optimization | Sandman, Ashy | Highest skill ceiling |
The Lethal Ape threat levels above are calibrated to the community wiki baseline roster, but every patch can shift the bands. Re-rank after each major monster update by re-running the four axes against any new entries. For ongoing roster tracking, the Lethal Ape lost tier page breaks down Lost alongside the other upper-mid chases, and pairs naturally with this threat-level overview as a second-pass ranking.
Frequently Asked Questions
What are Lethal Ape threat levels based on?
They are scored on four axes — detection range, chase speed, catch consequence, and escape margin — then adjusted by the gamemode modifier (+1 in Lab, neutral or +1 in Caves, -1 in Forest). Monster data such as Sandman's 41.5 speed is sourced from the Roblox Lethal Ape community wiki, with unverified values marked as community-reported.
Is Lethal Ape actually scary?
Yes, but concentrated in the S-tier monsters (Sandman, Ashy, and the Lab Infected) and in the Lab gamemode. The C-tier and B-tier monsters — especially Gus — are far more forgiving, which is why most players start there before working up to the apex chases. A full scare preview is available in this jumpscare compilation by Zaku.
Which monster should new players learn first?
Gus is the recommended starting monster because he is footstep-triggered only, slow in chase, and easy to avoid by walking carefully. Once Gus is comfortable, move to Kus, then Dus to build sprint discipline before attempting Sandman or Ashy.
Does the gamemode change which monster is most dangerous?
Yes. The Lab adds roughly one full threat band to every monster because of the long sightlines, while the Forest subtracts about one band thanks to the audio masking and wide escape paths. Caves sit in between — navigation is the real threat there, and once you know the bridge path most chases drop to recoverable levels.
How often does the threat ranking change?
The base roster has been stable across the recent community wiki snapshots, but each new monster update can add or shift entries. Check the Lethal Ape new monster update page after any patch, then reapply the four-axis scoring to any new monster to keep your personal tier list current.